
 |
1. Point of Use Cleaning: The Foundation of CleanYou’ve heard it said that “Cleaning is the most important step in reprocessing,” because what isn’t cleaned can’t be disinfected or sterilized. But cleaning isn’t a single event, it’s a process. If you’ve worked in an instrument/device reprocessing area before, you’ll know that cleaning involves pre-cleaning, transport, rinsing, manual washing, mechanical washing, and more. So we ask, what is at the foundation of cleaning? What is the “most important step” of the “most important step?” As the title of this presentation gives away, in this 20-part educational series we will be looking at the process of pre-cleaning, and showing why this initial step of pre-cleaning functions as the foundation of clean. So whether you’re a technician or leader, SPD or OR, Infection Preventionist, or any other healthcare professional, tune in and see how pre-cleaning can make all the difference in device reprocessing. |
|
 |
2. The Mission of Device ReprocessingAs we start our journey through Point of Use Cleaning, let’s take a look at our destination. As instrument reprocessors, we have two primary goals: that devices are safe for use on the next patient, and that the devices are not damaged by the process. Medical Device Reprocessors and users are the noble team that stand between hazardous pathogens and the vulnerable patients that entrust their lives to the surgical team. No mission could be more important; no calling could be higher, than the noble task of guarding the vulnerable from the threat of harm. As we look at and design our cleaning processes, train our surgery personnel, and evaluate medical devices, patient safety and quality must be at the forefront. Our cleaning process must be designed so that it will reliably produce safe instrumentation, using a means that also protects the integrity of that instrument. This mission highlights for us the high stakes of point-of-use cleaning. As we will discover in this 20-part series, point-of-use cleaning is the foundation of the cleaning process and kicks off the cleaning process. If we fail to appropriately begin the cleaning process at the point of use, we put both the next patient and that instrument at risk. |
|
 |
3. Point of Use Cleaning, Pre-cleaning, What is it Anyway?You say “tomayto”, I say “tomahto”; is there any difference between Point of Use Cleaning and Pre-cleaning? Both terms point to the same idea: the removal of gross soil from an instrument or device after use to prevent the hardening of debris or the formation of biofilms. The term “point-of-use cleaning” can be helpful as it identifies the ideal place for pre-cleaning to occur: at the point of use. Pre-cleaning is required for any instrument or device that is intended for reprocessing and cannot be immediately contained and transported for cleaning. The pre-cleaning process should keep the instrument or device moist during the transport process to prevent the hardening of soils. Once the device has been transported to the designated decontamination area, the terminal cleaning process can begin. During the terminal cleaning process, instruments will be rinsed, disassembled and opened, and cleaned using enzymatic detergents, brushing, and mechanical washers. |
|
 |
4. What’s the Point of Point-of-Use Cleaning?You may be wondering why we are calling point-of-use cleaning the “foundation” of clean. Can pre-cleaning really be that important and significant, that the whole house comes tumbling down without its foundation? Well here just a few of the reasons this step is not one you’ll want to skip:
For all of these reasons, pre-cleaning is a high priority in device manufacturer IFUs. You will often find instructions for how the device needs to be pre-cleaned during and after use to prevent damage to the instrument. |
|
 |
5. Pre-Cleaning In The NewsPre-cleaning is not some theoretical practice or a good idea talked about by infection preventionists. It has real-world impacts. In 2018, Porter Adventist Hospital in Denver halted surgeries after the Joint Commission investigation found 129 instances of “incomplete removal of gross surgical contamination” over the course of 13 months. Failure of the hospital staff at Porter Adventist Hospital to pre-clean surgical instruments contributed to contaminated instruments being used in procedures, putting nearly 5,800 patients at risk for surgical site infections, including exposure to HIV and hepatitis. The hospital reached out to the affected patients, citing pre-cleaning as the cause of inadequate sterilization. The hospital faced several lawsuits, some dating back all the way to 2015. If you feel like you “don’t have time for pre-cleaning”, you may find you have all the time you need after surgeries are cancelled. If it “costs too much labor” to add that to room turnover, remember what it can cost the hospital in lawsuits and in patient lives. |
|
 |
6. Can’t Touch This – BiofilmOne of the risks associated with inadequate pre-cleaning is the formation of biofilm. A biofilm is a “biological film” that is created when microorganisms adhere to a surface and bind together in a matrix, a thick and sticky substance. Biofilms form on many types of materials, but particularly those that remain moist like the internal channels of a surgical instrument. The protective gel of the biofilm matrix prevents the penetration of most detergents, disinfectants, and sterilants, allowing microbial life inside the biofilm to survive the reprocessing process. When the biofilm matures, it will release free floating cells from the biofilm, depositing microorganisms in its surrounding environment and potentially into the patient. Once a biofilm has formed and adhered to the surgical instrument, it can be very difficult to remove in the cleaning process, particularly inside instrument channels. Once biofilms have formed, standard cleaning procedures may not be adequate to remove them. An example from everyday life is dental plaque, which cannot be easily brushed off during normal hygiene. Detecting biofilm is also a challenge, since many times it will not be detectable or visible to the naked eye until the biofilm has matured and multiplied in extreme cases. The best strategy to combat biofilm is to prevent their formation by removing gross soil and flushing cannulas at the point of use. |
|
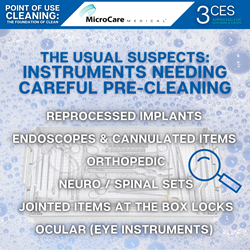 |
7. The Usual Suspects: Instruments Needing Careful Pre-CleaningPre-cleaning is a priority during and after any procedure, but there are certain categories of instruments that are particularly likely to need careful pre-cleaning.
|
|
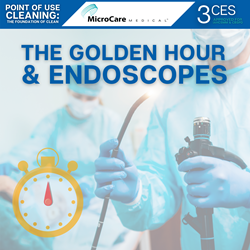 |
8. The Golden Hour and EndoscopesFlexible Endoscopes have an elevated risk of developing biofilms, due to the long, narrow cannulas that become contaminated during the procedure. If the endoscope is not pre-cleaned immediately following the procedure, soils can dry and impede the cleaning and disinfection process. The insertion tube should be wiped with a prepared cleaning solution, and the solution should be flushed and suctioned through the channels of the scope. In addition to pre-cleaning requirements, many scope manufacturers now require that scope cleaning begin within 1 hour after the pre-cleaning takes place. According to those manufacturers’ instructions, scopes that are not appropriately pre-cleaned or have been left to dry for longer than 60 minutes after pre-cleaning must go through an extended reprocessing protocol called “delayed reprocessing”. These additional reprocessing steps help break down any potentially dried soils so that manual cleaning and disinfection can be effective. Keep in mind that the “golden hour” to clean flexible endoscopes starts when the scope is removed from the patient and is pre-cleaned. Pre-clean and transport your scopes as soon as possible. |
|
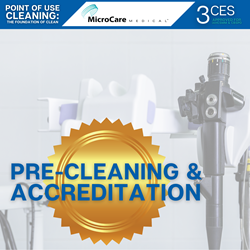 |
9. Pre-Cleaning and AccreditationEarlier in the series, we made mention of the Joint Commission’s investigation into a hospital’s pre-cleaning practices. This topic, point-of-use cleaning and instrument transport, has been a growing trend in surveys. In 2018, the Joint Commission released a “4-1-1 on Survey Enhancements” which gave an enhanced focus on maintaining the moisture of soiled instruments during transport and staging. In your facility, you can expect surveyors to ask to see instruments that have just come from surgery, observe how instruments are transported, ask staff how instruments are pre-cleaned, and open a set of sterile instruments to check for the presence of bioburden. Failure to comply with industry standards for pre-cleaning such as AAMI ST79 will result in a citation, and could be as serious as an Immediate Threat to Life. Joint Commission Standard IC.02.02.01 EP 3 is the most cited infection control guideline, “High Level Disinfection and Sterilization.” As you prepare for your next survey, no matter which agency is conducting the survey, take a hard look at pre-cleaning and transport. Pay particular attention to ancillary units that use reusable instruments, such as the Emergency Department, Pre-Op/PACU, Labor and Delivery, Wound Care, etc. Instruments should be pre-cleaned and transported according to policy no matter where they are being used. |
|
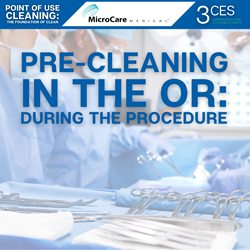 |
10. Pre-Cleaning in the OR: During the ProcedureA big misconception about point-of-use cleaning is that it only needs to be performed after the procedure is completed. However, since the goal of pre-cleaning is to prevent soil from drying on the instruments, there is a lot to be done during the procedure as well. It is critical to routinely wipe off and flush soils from instruments during the procedure using sterile water and sponges. If this is not done, instruments could be used and left to dry for hours during a long surgical procedure. The practice of wiping and flushing instruments with sterile water during the procedure is consistent with AORN and AST guidelines and should be implemented in every facility. The regular wiping and flushing of instruments will help remove bone, blood, and cement, which becomes very difficult to remove when dried on the instrument. Implementing effective pre-cleaning practices at your facility will mean more than just purchasing a pre-cleaning treatment; it will involve staff education and support. Appropriate pre-cleaning is a time commitment, which means that management and surgeons must be prepared to support staff and give surgical technicians the time needed to appropriately care for the instruments. |
|
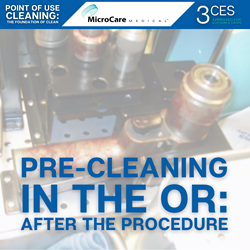 |
11. Pre-Cleaning in the OR: After the ProcedureAfter the procedure, the remainder of large tissue, bone chunks, cement, and adhesive need to be removed from the instruments. This step can be performed on the back table of the OR or in a soiled utility room. Any soak liquids used during the procedure need to be drained off; instruments should not be transported in soak liquids (per AAMI ST79, device IFUs, and AORN). Soaking liquids in the OR should be sterile water only. Saline should be avoided for any instrument soaking, as saline is corrosive to the surface of the instruments and will cause premature rusting and damage. Pre-cleaning treatment spray should be applied as soon as possible after the case is closed. Here are some tips for making your pre-treatment application more effective:
Once gross soils have been removed from the instruments, soaking liquids have been drained off, and instruments have been treated to stay moist, the instruments need to be prepared for transport. |
|
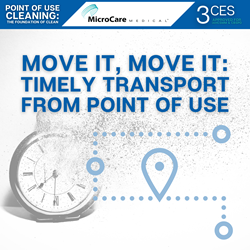 |
12. Move it, Move it: Timely Transport from Point of UseInstrument transport is so much more than getting things from point A to B. Every consideration in instrument transport matters for protecting staff, patients, and the instruments themselves. After instruments have been pre-cleaned at the point-of-use, they should be transported in containers with solid sides and lids that are puncture resistant and labeled with biohazard labels. This is to protect staff and others from exposure to the biohazardous contents and to clearly label the contents as biohazardous. Transport should take place as soon as possible following use, ideally in holding for less than 1 hour. These transport requirements may take some creativity to implement. What kind of signs can you add to your case carts to make them clearly designated as clean or biohazardous? How will ancillary departments transport small quantities of instruments back to Sterile Processing in a puncture-resistant solid container? How will you limit holding times and transport times for units that are far away? In some situations, delays in reprocessing are inevitable, such as off-site reprocessing centers or overnight procedures in a hospital with a 12-hour Sterile Processing Department. In these cases, products with tested enzymatic activity and anti-corrosives will be needed. |
|
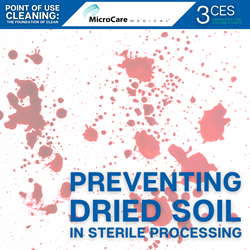 |
13. Preventing Dried Soil in Sterile ProcessingAnyone who has worked in a busy decontamination room in Sterile Processing knows that the cleaning delays for instruments are not over once they enter the decontamination doors. In many cases, instruments may sit in “queue” inside decontamination for up to an hour during the busiest processing times. Even if items were appropriately pre-cleaned after the procedure, workload backups in Sterile Processing can cause delays and allow soils to dry. Sterile Processing technicians need to be aware of their workload backup and reapply pre-cleaning product to any instruments that they cannot immediately begin to terminally clean. During the cleaning process, it is important to rinse and remove any pre-treatment spray from the instruments. Gels may dry as a hard or slimy substance; this needs to be thoroughly removed before putting the instruments into any mechanical washer (ultrasonic or automated). When rinsing instruments, use cool water (below 110 F) to prevent proteins from denaturing and becoming difficult to remove from the instrument. |
|
 |
14. Whose Job is it Anyway? – A Team ApproachSurgical instruments go through many hands in their use cycle: from surgeon, to surgical tech, to OR assistant, to Sterile Processing. So who is responsible for preventing dried soils on surgical instruments? The answer is “all of the above”. If every department is saying that it is someone else’s responsibility, no one ends up taking ownership for their part to play. It is not uncommon to see OR team members think of instrument cleaning as “Sterile Processing’s job” and justify skipping pre-cleaning because they have too much to do. A good way to help establish a team approach to pre-cleaning is to involve Infection Prevention, SPD Manager, OR Manager, Supply Manager, and any other department nurse managers whose department uses and transports surgical instruments. Work together as a team to establish a process that works for your facility, establishing responsibilities for each department and tools to audit the process. In our next posts, we will define what a successful pre-cleaning program should look like in your facility. |
|
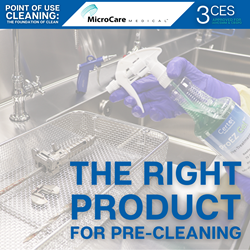 |
15. The Right Product for Pre-CleaningFor you to have a successful pre-cleaning program at your facility, your multi-disciplinary team should evaluate what is the right pre-cleaning product for you to use. There are a lot of products on the market that will help keep instruments moist during transport, similar to covering instruments with a moistened towel. For the pre-treatment spray to breakdown any soil during transport, the spray requires enzymes, which not all products have. Select an enzymatic pre-treatment spray that has been tested for active enzyme activity in real world conditions. If you know that there will be routine delays in transporting the instruments to decontamination (like in an off-site reprocessing center), products with enzymatic activity and anti-corrosives can help reduce the likelihood of damage to the instruments. A good pre-treatment product can help reduce the time required in cleaning the instruments, reduces the likelihood of retained soil on the instrument, and can save a facility from having to purchase replacement instruments due to irreparable corrosion. |
|
 |
16. The Right Process for Pre-CleaningTo have a successful pre-cleaning program at your facility, pre-cleaning needs to be a process, not just an idea. Simply buying a pre-cleaning product and hanging the IFU on the wall in the soiled utility room is not going to get you to reliable success. When defining a workflow for pre-cleaning, think through the logistics of where it makes sense to perform the pre-cleaning so that the product will be easily accessible and the task will be easy to perform. As you define your pre-cleaning process, make sure you consider these factors:
A well thought out process encourages teamwork and reinforces compliance through time and repetition. |
|
 |
17. The Right Protocol for Pre-CleaningWriting a pre-cleaning protocol for your facility helps solidify and standardize the agreed upon process for pre-cleaning. When developing the facility pre-cleaning protocol, consult local, state, and federal regulations (OSHA, FDA, etc.). Review device instructions (IFUs) and professional guidance (AAMI, AORN, etc.). Reference these documents in the facility protocol to demonstrate that the product and process selected are compliant with best practices. Keep in mind that the more specific you make the protocol for your facility, the closer you will be held to the process by a surveyor. Avoid naming a specific product in your policy; use language like “a product designed for pre-treatment.” If the policy says “wipe all bioburden from instruments during the procedure,” a surveyor will expect to find no bioburden on instruments in decontamination. Joint Commission suggests using language like, “During operative procedures, instruments should be wiped with a gauze moistened with water and lumens should be flushed, as needed”. This type of policy allows some room for variation, while still holding the staff accountable to wipe off and flush instruments. |
|
 |
18. Monitoring Compliance for Point of Use CleaningOne of the most effective ways to ensure ongoing compliance with pre-cleaning is to have regular monitoring of the process through audits and feedback cycles. Audits can be performed by department leaders, staff pre-cleaning champions, or a 3rd party like infection prevention. Ideas for auditing would include rounding on the units where pre-cleaning is happening and observing if all steps of the pre-cleaning process are being performed correctly. Another type of audit would be to check a random sample instrument set in the decontamination room of Sterile Processing to see if it has been appropriately pre-cleaned. These audits should be scheduled, routine, and documented. Track the percentage of compliance observed in these audits so you can make adjustments as needed and recognize great performance. Consider using a pre-treatment product that is more visible (colored or foaming) so that it is easy to tell if an instrument has been pre-treated. As sterile processing receives instruments from the OR and other units, they should be able to report back the percentage of compliance observed with pre-cleaning. This information can be captured in some instrument tracking systems or can be manually documented. |
|
 |
19. Educating for Lasting ComplianceWhen you kick off a new project and educate everyone involved, it is easy to be lured into thinking that the work is done. The product is in place, the policy is written, and everyone can speak to the process; all the boxes are checked. But if you want your pre-cleaning process to outlast the initial wave of excitement, you’ll need a plan for educating that goes beyond the process roll-out. The most significant part of this education plan has to do with onboarding. We can easily forget that the new people who join our team weren’t around last year when we rolled out the process. Make pre-cleaning a line item on your onboarding competency: that they know how to appropriately clean at the point of use, apply the correct product, and transport the item properly. Another aspect of education around pre-cleaning is finding creative ways to give reminders and in-services to the team members who perform the task. Posting signage in the instrument transport locations can be useful, but having periodic, in-person in-services on the use and benefits of a pre-treatment product can be a helpful way to keep pre-cleaning at the front of staff members’ minds. |
|
 |
20. Point of Use Cleaning: The Foundation of CleanThank you for joining us for this 20-part CE-Approved program on pre-cleaning entitled “Point of Use Cleaning: The Foundation of Clean!” We know that establishing an effective pre-cleaning protocol throughout your facility is no easy feat, but with the continually increasing complexity of surgical devices and endoscopes, it is more important than ever for Sterile Processing Departments, OR Leaders, and Infection Preventionists to make sure every surgical instrument and device is being pre-cleaned and transported according to best practice. If you select the right product and implement an effective process, your patients will be kept safer and your instruments and devices will continue to perform their best. As you work to establish those processes and protocols, we encourage you to use this series as a resource for new employee orientation and ongoing education. |