How to use the TriggerGrip™ PCB Cleaning Tool
MicroCare Electronics courses are your gateway to mastering all aspects of electronics cleaning. Whether you’re a seasoned professional or new to the field, these courses delve into the effective use of cleaning fluids, tools, and techniques tailored for every application. Learn how to choose the best cleaning solutions for specific challenges, ensuring exceptional results every time.
Dive into FAQs, step-by-step how-tos, dos and don’ts, and engaging instructional videos. Each course provides you with electronics cleaning knowledge while instilling the confidence and skills needed to tackle even the most challenging tasks. Whether you're improving existing workflows or implementing new cleaning protocols, MicroCare Electronics courses empower you to achieve excellence.
PCB Cleaning Efficiency: The Ultimate Guide to Using the TriggerGrip® Flux Remover Tool
High-performance electronics require spotless printed circuit boards (PCBs) for optimal functionality and longevity. This training will equip you with the knowledge and skills to tackle even the toughest flux residues and contaminants using the innovative TriggerGrip™ Flux Remover Tool. From understanding PCB cleaning fundamentals to mastering advanced techniques, you'll learn how to achieve cleaner boards, reduce solvent waste, and improve your cleaning efficiency—all while protecting sensitive components. Let’s dive into the world of precision PCB cleaning and discover how the TriggerGrip tool can transform your cleaning process!
Course Content:
Welcome
Learn how to use the TriggerGrip™ Flux Remover PCB Cleaning Tool. This tool is designed to make your PCB cleaning more efficient and effective, while minimizing solvent waste. Let's get started!
Why PCB Cleaning is Necessary
- PCBs, or printed circuit boards, are crucial components in all electronic devices, and they often accumulate flux residues, oils, and other contaminants during manufacturing and repair processes.
- Cleaning these boards is vital to remove flux residues that could lead to corrosion, short circuits, or signal degradation. Without proper cleaning, PCB performance suffers, leading to potential failures and reduced product lifespan.
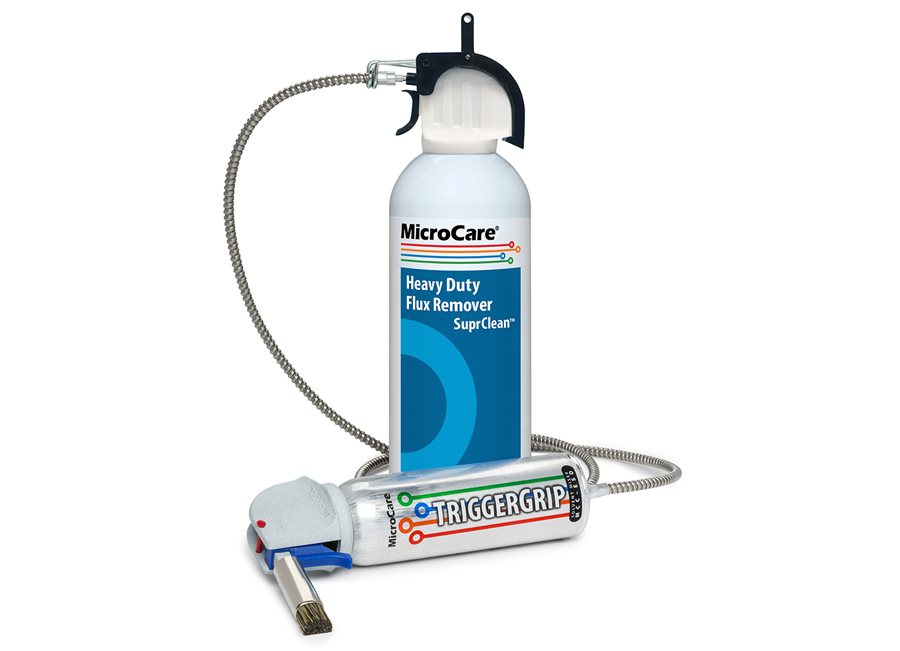
Overview of the TriggerGrip Flux Remover Tool
- The TriggerGrip® tool is a handheld cleaning tool that combines solvent spray and mechanical action for better cleaning efficiency.
- Key Benefits include improved cleaning results, less solvent waste, and faster cleaning times.
TriggerGrip Features
- It has an ergonomic trigger system for controlled solvent delivery.
- A brush attachment allows gentle scrubbing of PCB surfaces.
- It incorporates solvent management to reduce the amount of solvent used.
- It’s compatible with different cleaning fluids for various contaminants.
Components of the Trigger Grip Tool
- The Trigger Mechanism controls the flow of the cleaning fluid for precise application.
- The Brush Head scrubs the PCB surface gently.
- The Solvent Hose connects the tool to the aerosol can for continuous fluid delivery.
Types of Fluids to Use with the TriggerGrip
- The TriggerGrip works with most MicroCare aerosol flux removers in both standard and jumbo size cans
- Choose the cleaning fluid based on the contaminant to be removed. For example, No-clean flux may require a different cleaning fluid than rosin-based or water-soluble flux.
Safety Guidelines
- Always handle solvents with care—use proper ventilation and wear personal protective equipment (PPE) like gloves and goggles.
- When possible, choose a non-flammable flux remover for added facility safety.
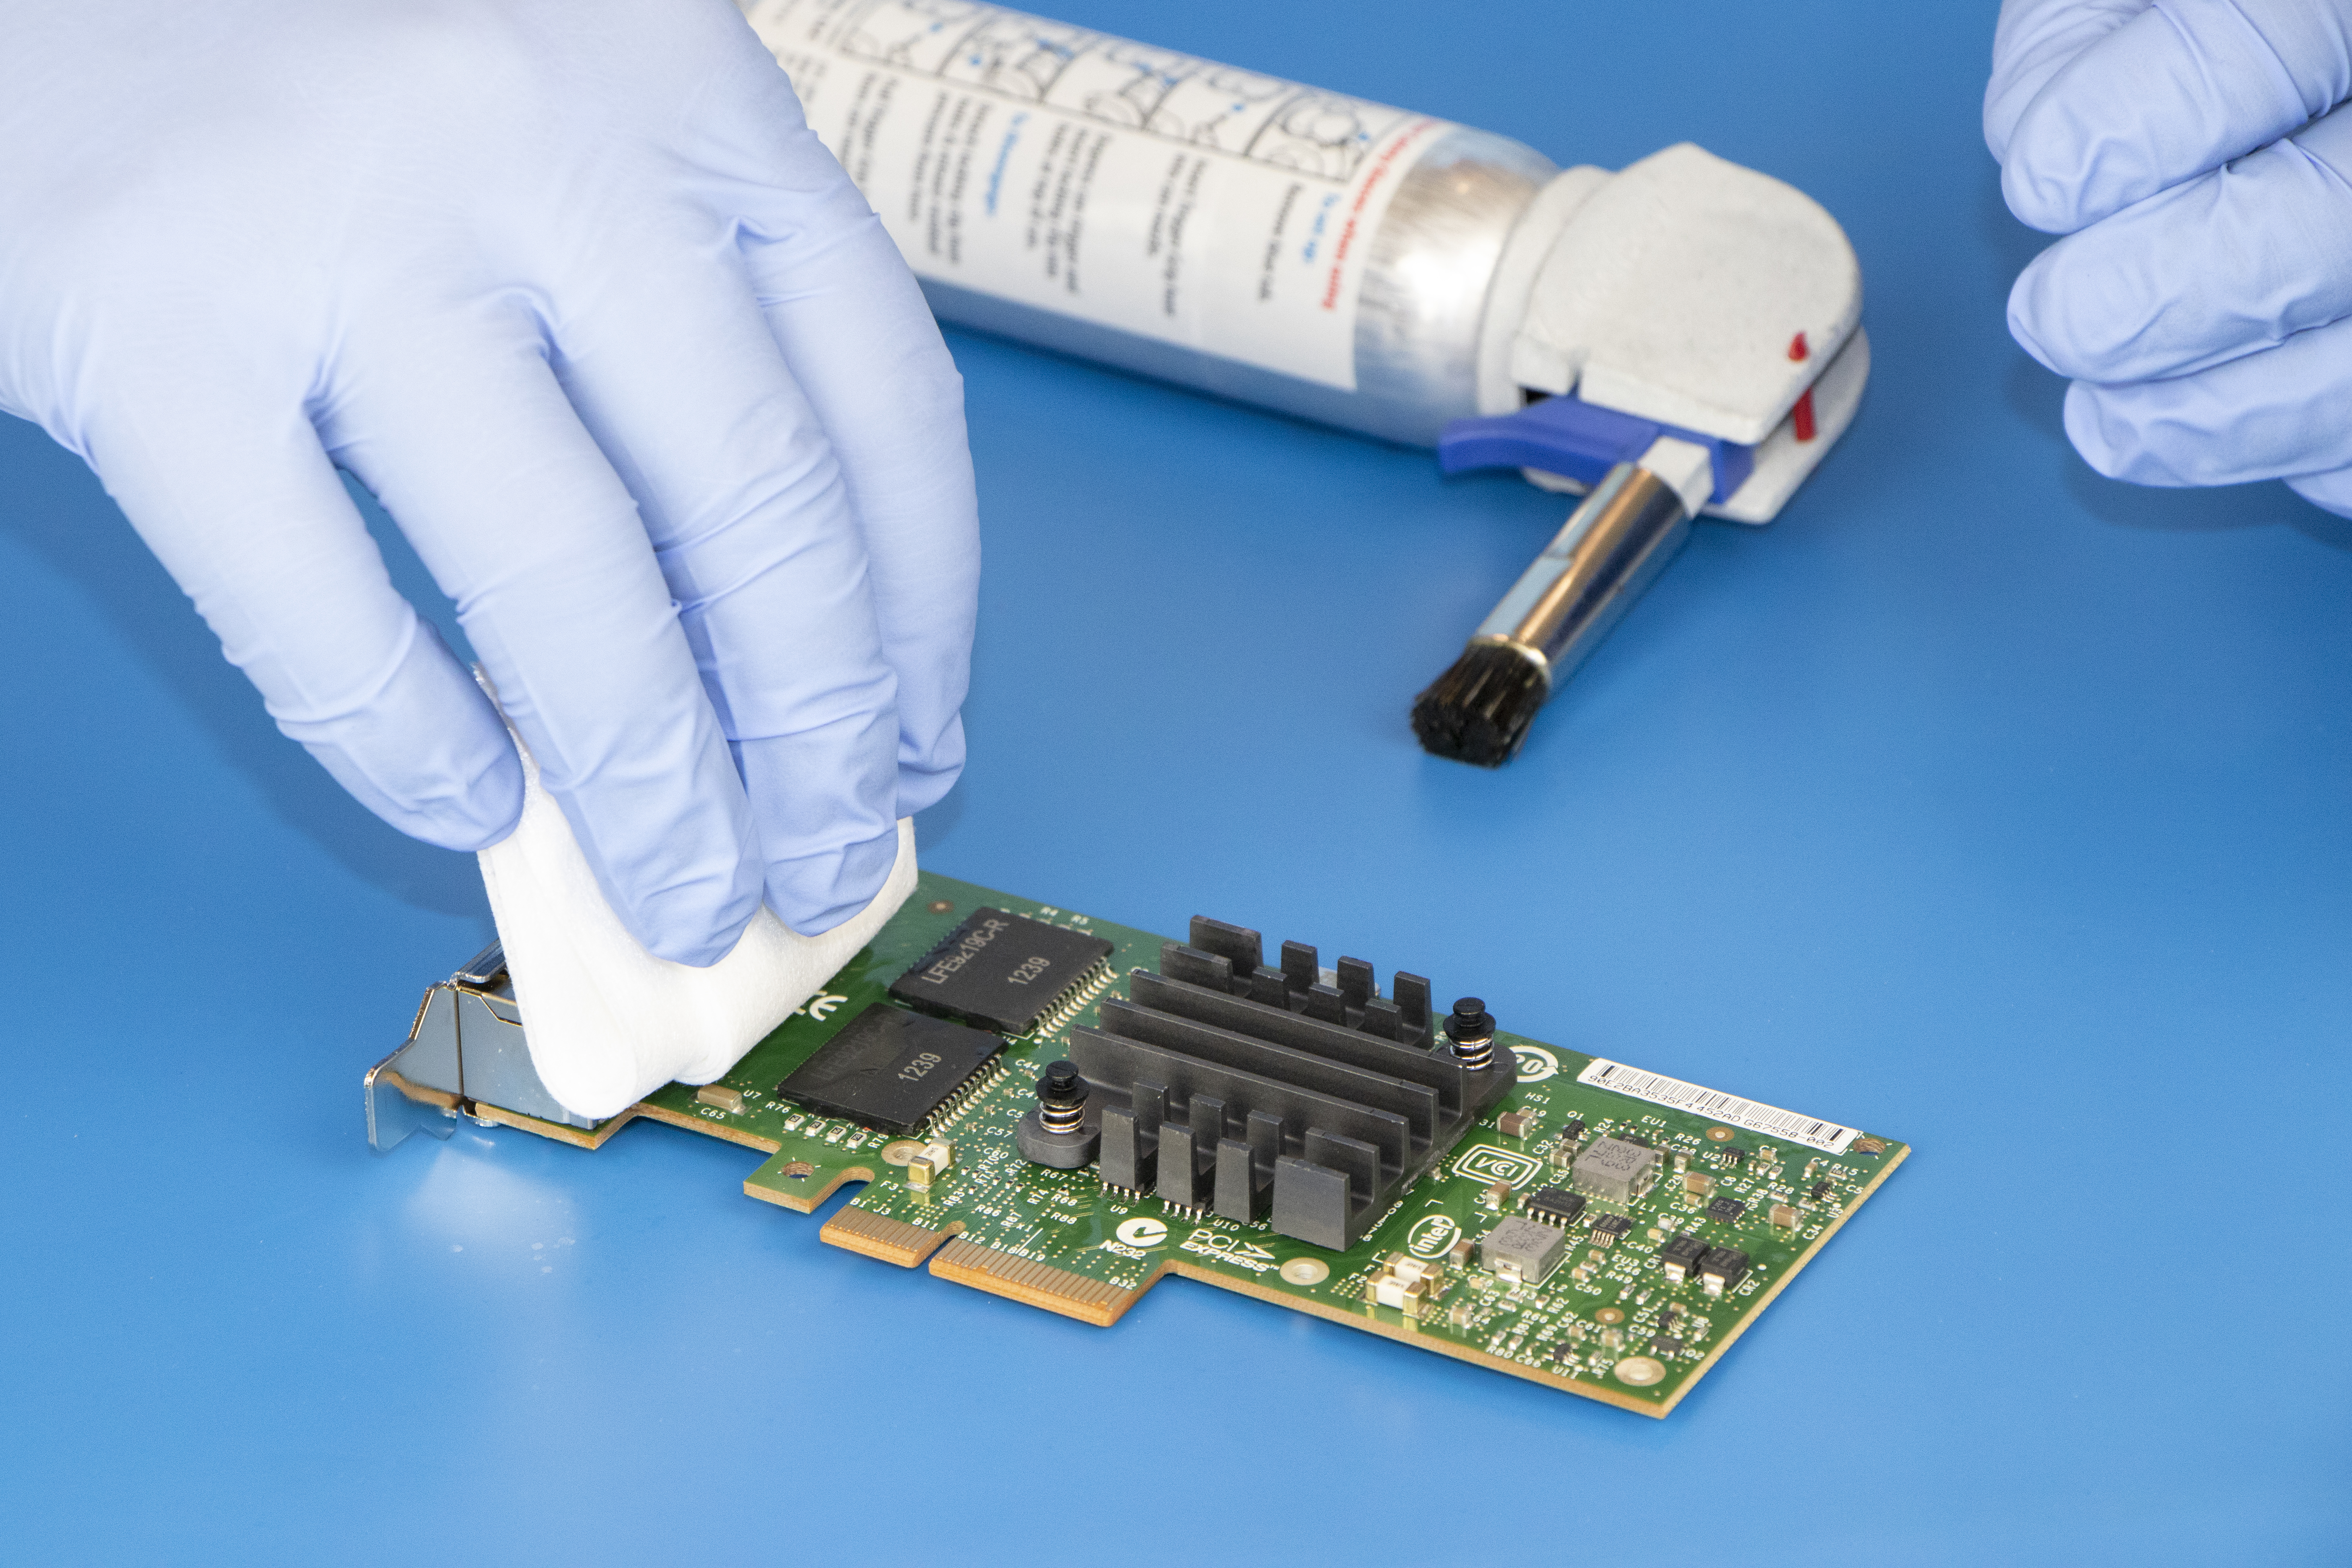
Step-by-Step Guide to Using TriggerGrip
Setup and Preparation
- Attach the TriggerGrip tool to an appropriate aerosol can of flux remover.
- Make sure you’re in a well-ventilated area and wearing safety glasses.
- If needed, look at the PCB under magnification to spot flux or contamination that needs cleaning.
- Focus on targeted cleaning: Pay attention to flux residues near solder joints, under components, and in tight spaces.
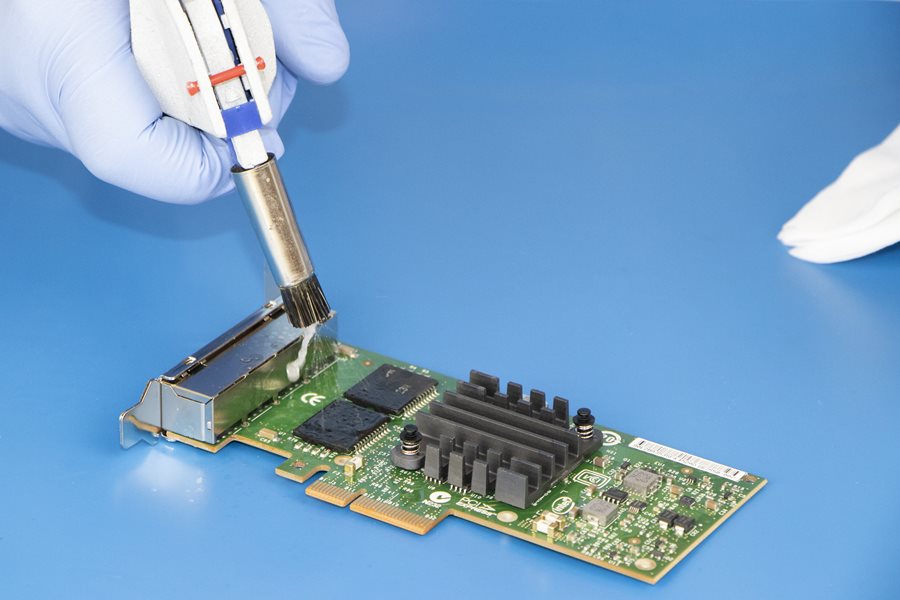
Step 1: Begin Cleaning Process – Wet
- Position the brush head on the contaminated area.
- Squeeze the trigger to release the cleaning solvent.
- Use short bursts to avoid over-saturating the board.
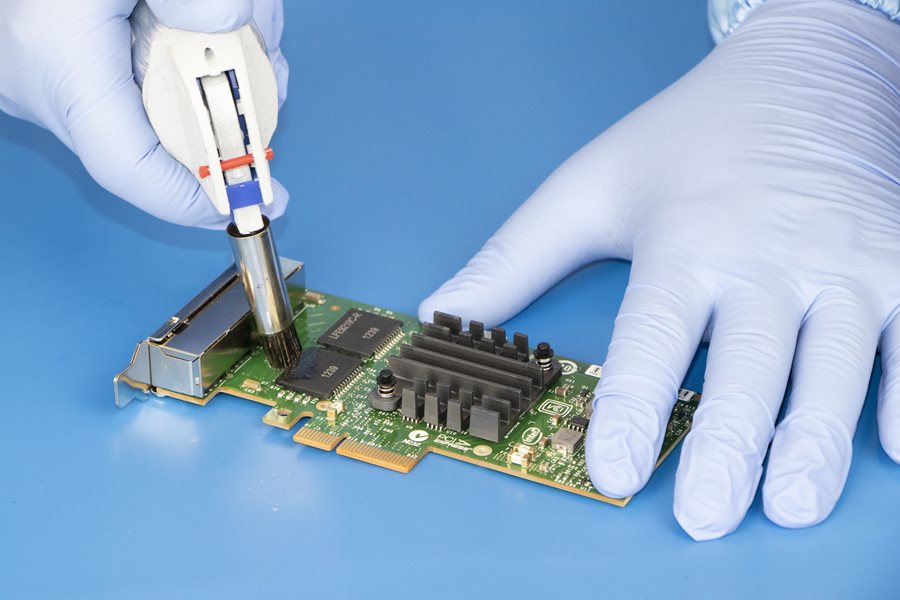
Step 2: Scrub the PCB - Scrub
- Gently Scrub the PCB.
- If you see streaking or residue, adjust your cleaning angle or apply additional solvent.
- If you notice insufficient cleaning, increase brush pressure or solvent flow to tackle tougher residues.
- Choose a softer bristle brush to avoid damaging delicate components or connections.
- Tip the board slightly or scrub through a lint-free wipe to keep the cleaning fluid from pooling on the PCB surface.
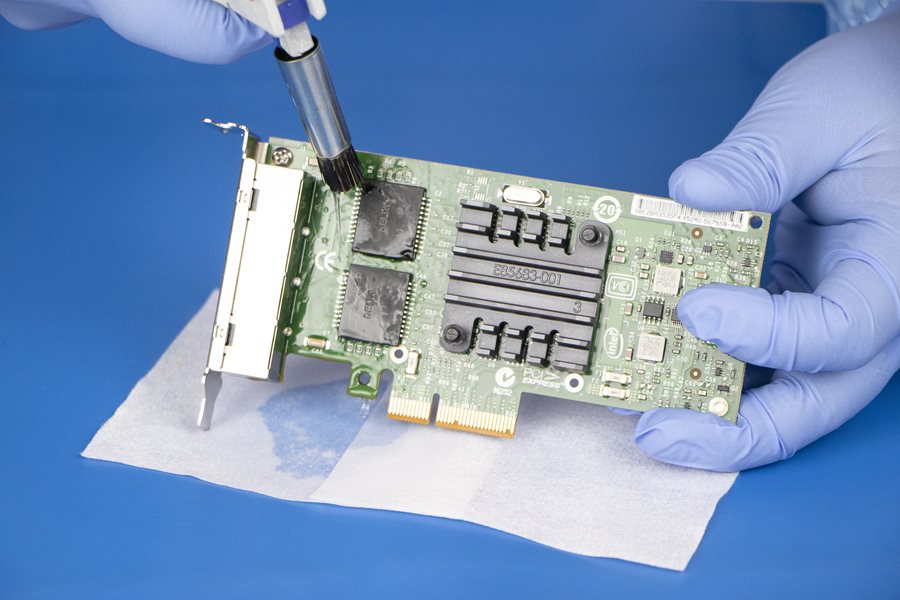
Step 3: Rinse the PCB - Rinse
- Rinse the PCB with more clean fluid
- Tip the PCB at an angle to allow the cleaning fluid to flow off the PCB.
Step 4 : Dry the PCB – Dry
Avoid using compressed air since it may cause ESD to form.
Advantages of Using TriggerGrip® Over Traditional Cleaning Methods
- The TriggerGrip® tool improves solvent efficiency by delivering just the right amount, saving on costs.
- It also offers more consistent cleaning with the brush and solvent combination.
- The ergonomic design reduces hand fatigue, which is great for long cleaning sessions.
- Overall, it’s a cost-effective, precise cleaning method compared to traditional spray-and-wipe techniques.
Resources for Further Learning
Videos
Video: https://www.microcare.com/en-US/Resources/Resource-Center/Videos/How-to-Safely-Connect-Disconnect-the-TriggerGrip-P
Tech Articles
How to Clean Flux from a PCB: https://www.microcare.com/en-US/Resources/Resource-Center/Tech-Articles/How-to-Clean-Flux-from-a-PCB-1